Pages

Monday, March 12, 2012

Client Desk Makeover

Hello everyone!  I am super excited to be back in the blogosphere, sharing my latest makeover.

I am saddened that I started working on this and forgot to snap before pictures. Ugghh. I get so excited to dive into these projects, that I am midway through and realize..."snap! I forgot to take pictures!"

I did, however, catch the most important parts midway through.

What I love most about this business, is meeting new people who inevitably become friends along the way.   I was introduced to my latest client at my bi-monthly MOPS (Moms of Preschoolers) meeting.  Just like me, Teresa is a wife and mother to two (adorable) little boys.

We got together to discuss the boys' playroom.  She has a beautiful, custom home.  Nearly every room is finished, but the media room was lacking a little TLC.  It was instantly apparent that Teresa has great style - a mix of traditional, and rustic with some modern touches.

The family recently moved into a new home, and there was a desk left by the previous owners.  Instead of donating it to Goodwill or discarding it at the curb, she decided to repurpose it into something fab!  If we could all just use our imaginations a little bit, we could save so many things from their ultimate peril.

A designer's dream client is someone that will allow you to express your ideas, and ultimately give you creative flexibility.  Teresa has given me complete freedom in this project.  I bounced my ideas off of her, but ultimately she trusted me to execute my plan.  It makes me want to work that much harder, and go above and beyond to deliver a great product.

After searching Pinterest for some inspiration.  I searched Miss Mustard Seed for some ideas for paint finishes.  I loved this piece from Miss Mustard Seed.  She is truly incredible.  I can't wait for her new book to hit the shelves.  I am sure it will be filled with plenty of eye candy.

The shelves of the desk had veneer, which was slightly damaged en route to my garage.  It was fixable, but after examining the remaining drawers, I noticed they were all peeling from the wood surface.  It gave me an idea. After slight peeling back the veneer, I noticed that the glue had a wonderful texture.  This was an opportunity to really set this piece apart, and give it some texture.


I proceeded to peel back the veneer on each drawer, using a flat screwdriver and a hammer as a chisel.  I sanded the surface with an orbital sander to remove any shards of wood, leaving as much texture as possible.  You can see these events weren't necessarily in order. I painted one the drawer fronts prior to removing them, deciding only after to chip away all of the veneer.

After removing the veneer from the doors, and sanding them with the orbital, I painted the drawer fronts with a coat of Old White.  Once the paint dried, I rubbed the drawer fronts with a coat of clear wax.  Then, I mixed one part clear wax with one part dark wax and rubbed it into the drawer fronts to create a beautiful textured appearance.


I painted the entire desk with two coats Annie Sloan's, Old White, and waxed it before sanding to cut down on the chalk dust.  I heavily distressed the edges of the desk, allowing the original wood to show through.  Since this will be in the playroom of a two, busy boys, this will get a coat or two of Minwax water-based polycrylic in satin finish for added protection.


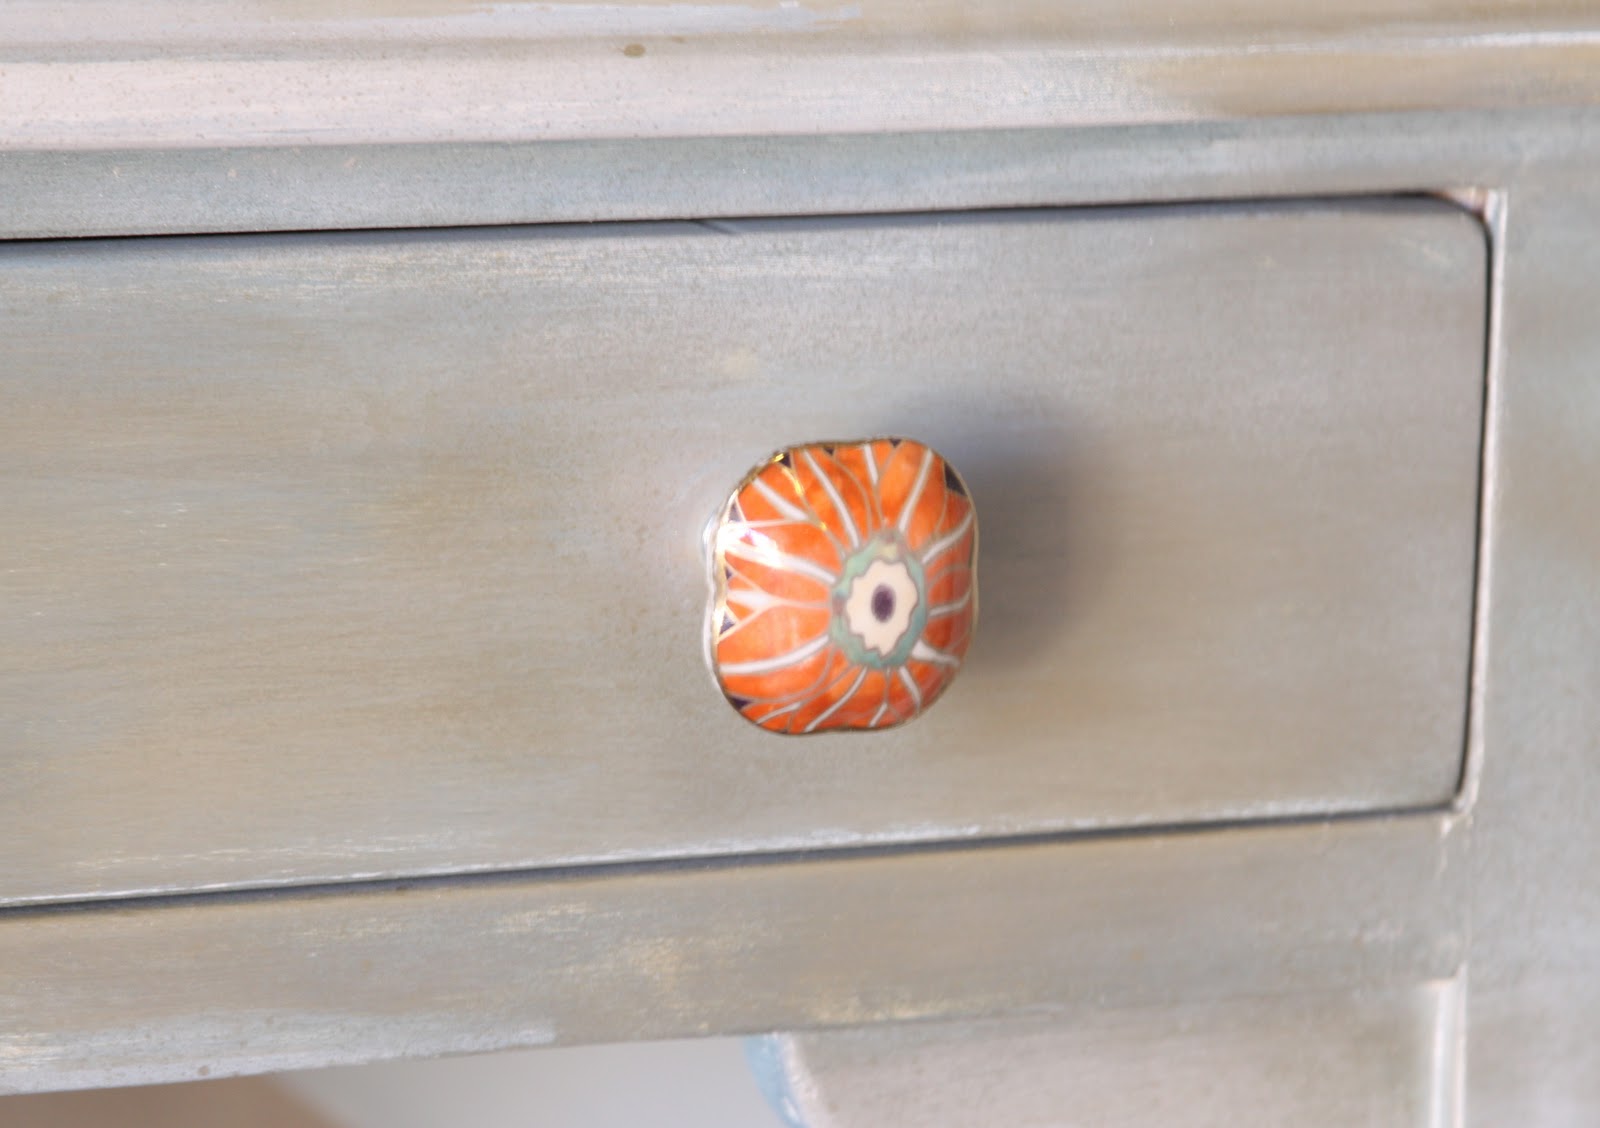
I updated the hardware - snagging this pull for the middle drawer on the clearance rack at Anthropologie for just $5 - marked down from $18 (yikes!).


The rest of the drawer pulls were purchased from Lowe's for about $3.50 each.  We updated all of the hardware for less than $40!  I love to mix pulls - don't think you have to go all matchy-matchy with your hardware.  It will add more character to your piece.


Here is the finished desk.


I lined the drawer's with some pretty, gender-neutral paper for an added touch. 


And here is the matching chair, with a new finish of Old White.


What a happy pair... They will be right at home in Teresa's playroom. 


Oh, and one last thing....

Thank you, Teresa, for giving me a great subject.  I am so looking forward to working with you!


Linking to:

Wednesday, February 8, 2012

Salvaged Wood Shelving in Kitchen

I have been working on slowly updating my kitchen. It's only a few years old, but my tastes have changed since we moved in 5 years ago, and I am loving all of the light and airy kitchens these days.  Recently, we updated our builder-beige paint to the perfect shade of warm gray.  It adds a more contemporary look to what is otherwise a very traditional kitchen - dark maple cabinets and travertine backsplash.

I have wanted add some shelving to display cookbooks and my lovely china from my wedding registry.  I am making a point of use my occasional dishes, otherwise, it never sees the light of day.  What's the point of beautiful dishes if they are always tucked away in a cupboard?

I was inspired by these West Elm shelves and numerous posts on Pinterest, and knew that I wanted to create some open shelves out of salvaged wood.  I found a local salvage yard in Austin, and made the trek with my girlfriend and the two boys on a Saturday morning.

I was able to snag the perfect piece of reclaimed wood for just a $1 a linear foot! It was perfect shade of weathered gray. I managed to get the 8-foot piece of lumber in the car, with the boys in tow.  I hosed it down, scrubbed it with some Krud Kutter and let it dry in the garage for a couple days.  I had to sand it pretty good with the heavy-grit sandpaper, but I didn't go crazy making sure it was perfectly smooth.

I measured my wall and had a friend make the cuts, and was able to get four, 18" shelves - perfect for my narrow wall.

Off to find my brackets.

I purchased these at Home Depot for just $6 each.  I like the curved edge and the brushed nickel finish.  Originally, I had intended to spray paint the brackets matte black, but I quickly changed my mind once I saw them on the wall against the gray paint.  I could have chosen standard black brackets with the straight arm, but I thought the curved arm softened the industrial feel, and created a more decorative look.


I wanted to utilize the entire wall to showcase my artwork.  I purchased my drawings  at an estate sale for $20.  They are original, and signed by the artist.  I also opted to create a low shelf that would act as bookshelf for my cookbooks.  I made sure to secure it with anchors in case the kiddos, pull on them.  They are very sturdy.

A couple things to keep in mind when hanging your shelves. My wood had two different finishes - the underside looked like plywood, while the opposite had a beautiful rustic look. I wanted to show off the weathered wood, so I made sure that the top shelf had the weathered wood on the bottom so you can see it from the floor.


Also, when drilling the holes in your salvaged wood, make sure you pre-drill pilot holes.  Weathered wood is dry and porous, and you risk splitting the wood if you don't pre-drill.

And here is the final result.


Not bad for about $15 per shelf.  Sure beats the hefty $79 price tag at West Elm.


I am still playing around with the accessories, but I just couldn't wait to share.


Hope you enjoy!


Linking to:

My Uncommon Slice of Suburbia

Saturday, February 4, 2012

Furniture Spotlight

I think am in love.... My husband introduced me to a new furniture collection.  I am salivating.

The New Traditionalists have nailed it.  This collection is the perfect blend of classic and traditional, with a modern twist.  Many pieces have a Hollywood Regency feel, but with contemporary colors and finishes.

Here are a couple of my favorite pieces.

I don't know one man who wouldn't die to have this couch in his office or study.  It's sleek and masculine, but with impeccable tailoring.  And it happens to combine some feminine characteristics as well - gently sloping arms, and classic curved arm rests. This is the perfect marriage of his/hers couch.


And check out this credenza?! Isn't it totally gorge? Ooooohhhh la la


And this has to be my favorite.  Look at this baby changer! How chic. I love the lipstick red drawers. That is one lucky baby, I tell ya.


I hi-lighted just a few of my faves, but I recommend looking at the entire collection because all of it is amazing, and hand- crafted in the USA.  

Hope you enjoy! 

Wednesday, February 1, 2012

Pottery Barn Knockoff - Desk Makeover

I am so excited about my latest makeover. This beauty was originally a custom piece from the hubby's furniture line, Kanto Home.  It was a custom order for this Pottery Barn knockoff .  Unfortunately, it arrived in the wrong color - it was supposed to be antique white, but ended up being a stark white finish.

I don't have the original before picture, unfortunately.  I started painting it, and completely forgot to snap them until midway through.

You can see from the PB website, it was a pretty simple piece, but I knew I could give it some high style with a little experimenting.  I have always loved the turned leg - it's so feminine and romantic.

I was anxious to test out my new Annie Sloan Chalk Paint colors - Aubusson Blue and Paris Gray.  I started painting the desk with the a watered down 50/50 mix of the two.  I decided that the blue was a little too strong for the look I wanted.


After my first coat dried, I went over the desk again with the Paris Gray, diluted with a little bit of water to create a wash.

Once the paint was dry, about 2-3 hrs later,  I waxed it with a coat of the AS clear wax and a cloth.  I waited about 12 hours until the wax had cured, then gently distressed just the edges and the legs with a fine sanding wedge revealing the white underneath.

I  had achieved the subtle blue I was going for, but I decided it could still use a little pizazz.

Enter my trusty paint can.  Is there anything that doesn't benefit from a hint of sparkle?! I did the unthinkable and went over the entire desk in Krylon's Brushed champagne spray paint.  After spraying the color, I immediately wiped the area with a soft cloth.  This technique gave me just a subtle sheen and eliminated any overspray.


Off to Anthropologie to find some killer drawer pulls.

I decided on these little lovlies.   Don't you just love the hardware at Anthropologie? It is my go-to place for really eccentric things.


I purchased four lucite drawer pulls, with a hint of gold, contrasted with coral drawer pulls for the center. The coral gives it a pop of color, and they have a hint of blue to tie everything together.


What do you think of the results?  It turned out just as I had envisioned! I will finish it off with a clear coat of poly for added durability.


I think it is sophisticated enough for an adult space, but could also be the perfect complement to a tween room.

How did I do?

Linking to:
Tuesday's Treasures - My Uncommon Slice of Suburbia
Wow Us Wednesdays - Savvy Southern Style

Wednesday, January 4, 2012

Luca's Updated Book Shelf

November and December always seem to fly by.  If you have been following my blog, you may have noticed it has been a little light on the DIY.  I neglected to post my latest revamp.  It was a small project, but a MUCH needed upgrade.

I have been in the process of slowly cleaning out the unnecessary clutter in preparation for the new year.  Each time I think of throwing something away or passing it off to Goodwill, I ask myself the following questions:


Why am I getting rid of this item?
Will I need this in the future?
Can I update the item, and put it to use now?


If the answers to questions 2 and 3 are NO, it's off to the donation pile.  But one should never underestimate the transforming power of paint.

Meet my subject.

Blaahhhh

I purchased this bookshelf from Target for Mateo's room when he was a baby.  It's not exceptional quality, and the slightest nick reveals cheap particle board lurking under the espresso finish.  What can I expect for $100? Once it started showing it's age, I moved it to the playroom to succumb to even more abuse.

Now, I need a shelf for Baby Luca.  I have an obsession right now with lightening up every dark piece of furniture in my home. I knew I wanted to do a contrasting color for the back of the shelves and high-gloss white for the exterior.  I found this perfect shade of chartreuse for the back of the bookcase - Glidden's Olive Oil.  It looks a little more yellow in this picture, but in person it has a tinge of green.

The chartreuse color makes me smile.  It's so bright and sunny, and coordinates perfect with the new artwork.  I purchased this original mixed media print at the Goodwill auction for $15!


....Well hello Mr. Sock Monkey

Look at the amazing reflective qualities of this paint.  I used Glidden's Trim & Door paint in antique white.  It's a little tricky to get used to, as it is a gel-based product.  I highly recommend watching the tutorials, but I will definitely be using it again.  Another downfall is that it took for-evahhh to dry - it wasn't hardened to the touch for at least 24 hrs. Well worth the wait in my opinion.

I have a few more things in the works right now.  Luca's room is constantly changing as I am still figuring out what I really need, but I will post more pictures of his space in the near future.

Look at that face..... 


He will be 9 months in 2 days! (tear) I can't believe how fast time flies. 

Have a great Friday!

Linking to:
http://www.somewhatsimple.com/sys-blog-link-party-with-plum-paper/

Monday, January 2, 2012

My Resolutions


I'll be honest, I have never been much for establishing and sticking to New Year's resolutions.  Of course, I will go through goals in my head, and tell myself I am going to improve on something.  But I have never had any real accountability. Well, that is about to change right now, friends.  I am about to immortalize my goals for 2012 in cyberspace history.

I am a firm believer that the most successful New Year resolutions are not just short-term goals but lifestyle changes.  It would be great to drop that extra five pounds for the new year, but wouldn't you really like to keep it off forever?  That doesn't happen without making serious changes to your diet and your lifestyle. Resolutions are most successful when we change our bad habits and create routines that set us up for success.

2011 was a challenging year for many of us.  It wasn't my favorite.  But even with all of the challenges, there was a lot to be learned, and we had our share of blessings as well.  The greatest gift we received this year was Baby Luca, born just 5 days shy of my 30th birthday.  I am so thankful to have two healthy boys and a wonderful husband. 

Without further ado, here are my New Year's resolutions for 2012, in no particular order.

Wake Up Earlier.   I am not a morning person.  Never have been, and it's safe to say, I probably never will be.  We tend to be late sleepers in my house.  This would be fine and dandy if I was a dude, and I could hop in the shower and be ready in 15 minutes.   I have had the same nighttime routine with my children since they were born.  Bath - book - bed.  It usually only takes an hour to complete the three, but ever since Luca was born, my 3-year-old doesn't want to sleep!  AGGHHHH!!! I have tried everything, but the child refuses to stay in his room.  Needless to say, it makes for very long evenings, and results in me going to bed at 12:30-1 a.m. most nights.  I need that time for myself to wind down in the evenings.  I am finally resulting to the one thing I haven't tried which is to put a lock on the bedroom door.  If you have any tips or suggestions, I would love to hear them!

Be More Punctual It never fails. I am always 15 minutes late dropping Mateo off for school.  I especially try to make an effort to be timely for other appointments, and sometimes still fail miserably.  For example, I have a friend that graciously gives me pilates reformer lessons on Saturday mornings.  It is such a wonderful thing she is doing for me, and the last couple times I have been 8 minutes late.  It gives me anxiety, makes me feel terrible and it's soooooo not worth the added stress.  For 8 measly minutes?! Puuulllleeez!  I think a little more preparation and a couple of easy modifications in my routine and it make a world of difference.  I know this - I just need to do it.  Couldn't you easily spend all of the previous day preparing for the day ahead?  I could keep my self busy just getting ready to get ready.


Learn to Sew  Did you know that I have access to tons of designer fabrics?  I have big plans to build my Etsy store this year to add more vintage accessories, reclaimed furniture pieces and custom pillows.  There is nothing like new pillows to add a pop of color or pattern in room.  And they can be switched out with the season for an inexpensive update.  I plan on purchasing a sewing machine in the very near future and start making some pillows.  If you have any reco's for great machine, I would love to hear.

Listen Without Interrupting

Take Better Pictures We have a Canon professional camera, and I have been playing around with it lately.  If the pictures turn out nice, it's luck, because I have no idea what I am doing.  I take my own pictures for my blog, but what separates good blogs from great ones are the photos.  I have always loved photography.  This year I want to take it a step further and gain some knowledge on how to improve my abilities, snap great closeups, still-life photos and better pics of the fam.

Get in Fightin' Shape I have always been pretty much the same size.  Good but not great.  Like most of us, I have a fitness goal for 2012.  I have never really pushed myself to be in amazing shape, probably because I have always been comfortable.  Well, I am ready to push out of that comfort zone.  I am surrounded by women at the gym in their 40's who look like they could kick my arse.  And last year, I witnessed my husband transform himself into the best shape of his life.  He dropped 10 pounds I didn't know he had to lose.  He looks incredible.  I owe it to him, and myself to reach this goal. 

Improve My Blog and Grow my Readership I started blogging because I love to write.  What started out as a hobby has turned into a passion, and I realize that the blogging community is like a family.  I feel like I know the people I read about, even though we have never stepped foot in the same building. Blogging can be highly personal, and it is a little daunting to put yourself out there for the world to read.  I have so much to share.  I hope that you find my work inspiring and interesting, and will continue to join me on this adventure that is my life!  I will be eternally grateful.


So there they are.  Of course, there are even a few more, but some things you just have to keep for yourself....hehe.  Have you made your resolutions? Please share!

Wednesday, November 30, 2011

'Tis the Season....

....for decorating, entertaining and holiday link parties!  I will be linking up the following tablescape to Centsational Girl's party for a chance to win a $100 Home Goods gift card in addition to a few others.

Here is my gold and silver palette inspired by nature.  Maybe it's a sign of the times, but I am in the spirit to use what I have and truly embrace the old adage, "waste not, want not."  I am proud that everything on my table, with the exception of a couple tree ornaments and the food, was already in my home.

Did anyone catch the 60 Minutes program on Sunday about the homeless families in America? It really hit home with me, and put things into perspective.  This year has been challenging for so many families, and our family is no exclusion.  At the end of the day, I am so thankful my little family is happy and healthy.  As long as we have each other, I couldn't ask for more.

That being said, here are the goods....

I mixed gold and silver for a timeless look.  The beaded China was from my wedding registry via Crate & Barrel, and I mixed it with some silver pieces inherited from my grandma's collection for a vintage look.  I added some brass candle holders purchased from Goodwill...


I LOVE decorating with food...


I stole a few IKEA candles from my fireplace for some ambiance, paired with some leftover green moss and curly willow from my floral supplies.  The silver tray was a wedding gift from Peru.


some curly willow....


....some silver and gold BLING.  The tree ornaments were from my collection, and the icicles were C&B circa 2010.


...and more BLING


I went without a table cloth to showcase our new table, courtesy of Kanto Home....


I swapped out my host chairs for the Ikat Farmhouse Chairs from my previous post.  The miniature trees were from Big Lots for $4, the mercury ball was from my bookshelf.  The votives are C&B from last year.

Have you caught the decorating bug?  I am just getting started, so bring on the holidays!

Linking to the following holiday link parties: 


Love,
Jamie